Unique DIY Mudroom Floating Bench With Storage Cabinets
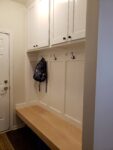
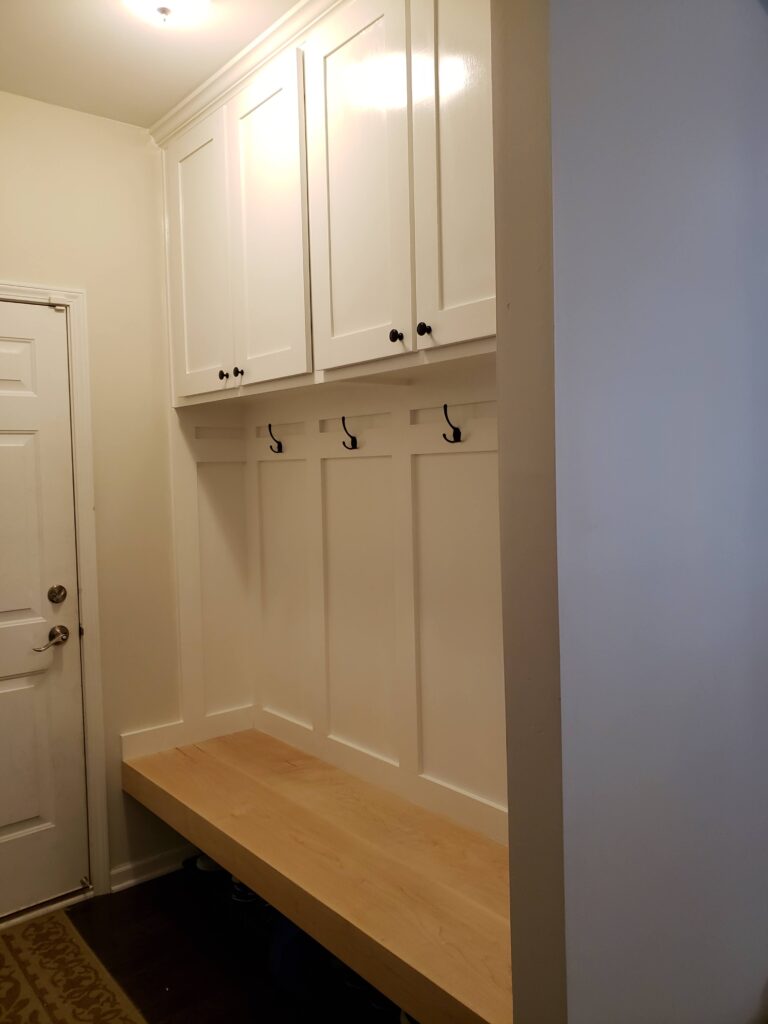
We are lucky to have a little space next to our garage door that was designed to have some sort of a bench for a mudroom. The bench/locker the builder offered wasn’t much to look at and didn’t fully use the space, so we opted to skip it so that we could build our own at some point. We used a standalone bench for the last few years, which kind of worked, but we really wanted a built-in with hooks and cabinets. Well, we finally got around to it and the final results were better than expected.
I started where I usually do, by researching what others had done in similar spaces and by figuring out what “standard” dimensions I should design within (bench width, height, hook spacing, cabinet height, etc). I decided that I really wanted to pull off a “floating” bench, in that there are no visible supports under the bench. The walls on three side of the bench would carry the full bench load and the area under the bench would be wide open to store shoes, bags, etc. With that decision made, I went about debating if I would make or buy the upper cabinets. I really, really, really didn’t want to make the cabinets due to the time it takes and the amount of other projects I had on my plate at the time. But I just couldn’t find something that would work within my design dimensions. Plus, the hook area would have to be painted so I would need to paint the cabinets to match, which means I was not getting away with buying cabinets off-the-shelf. Time to dust off my cabinet making skills!
Overall Design Approach
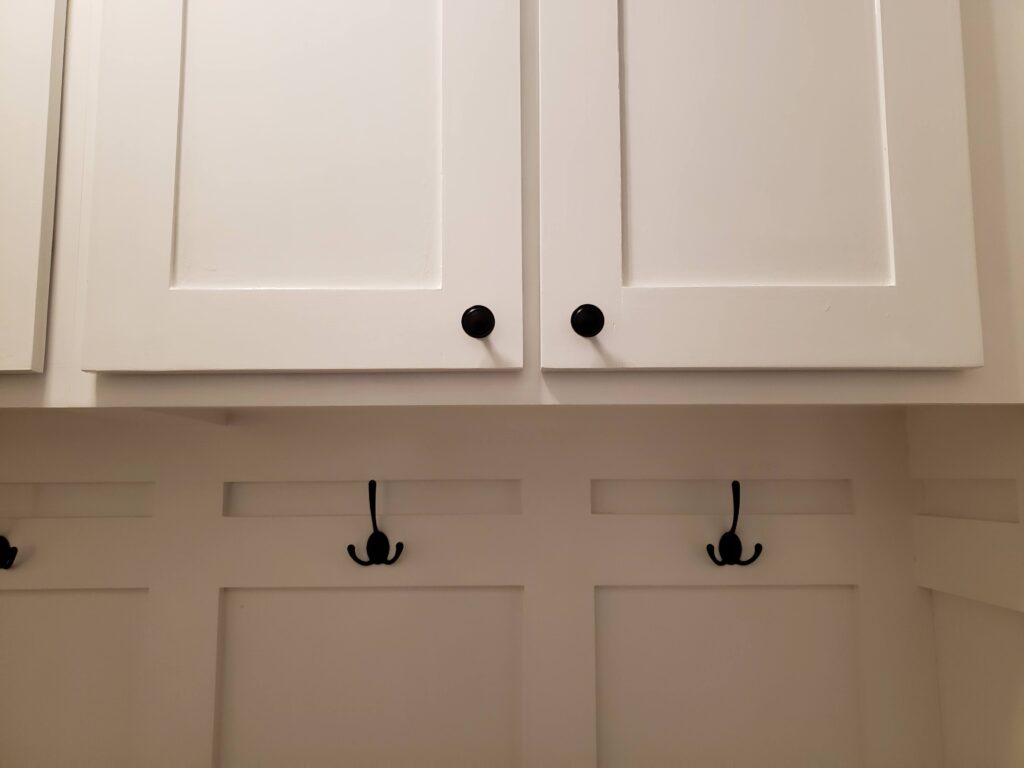
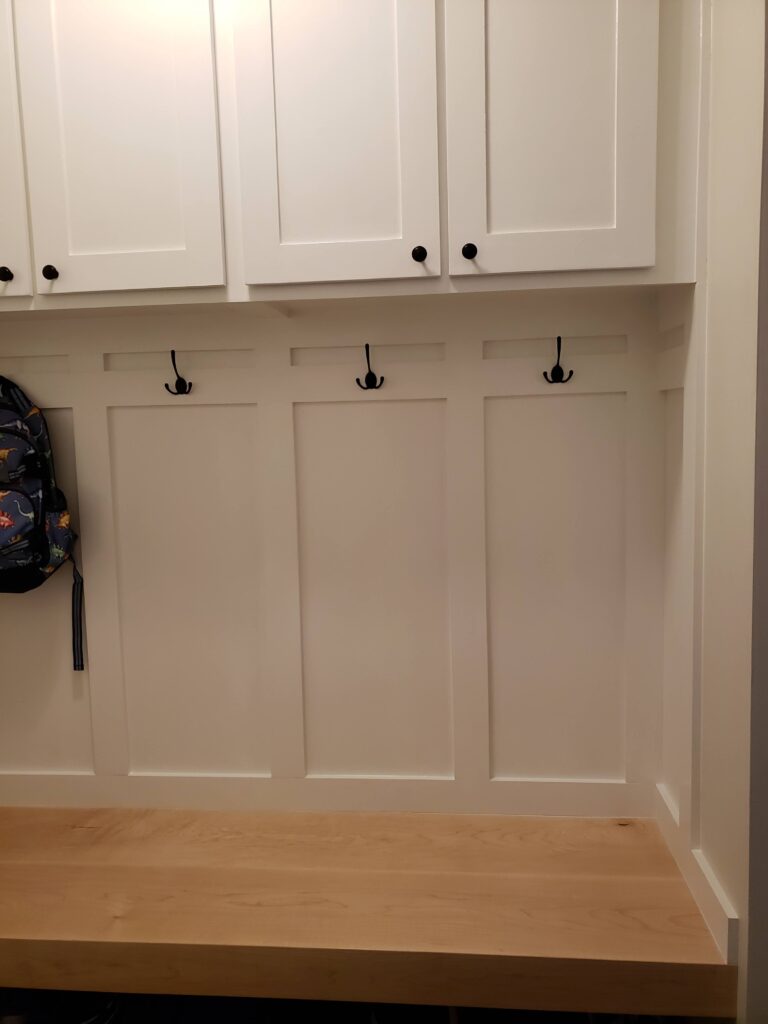
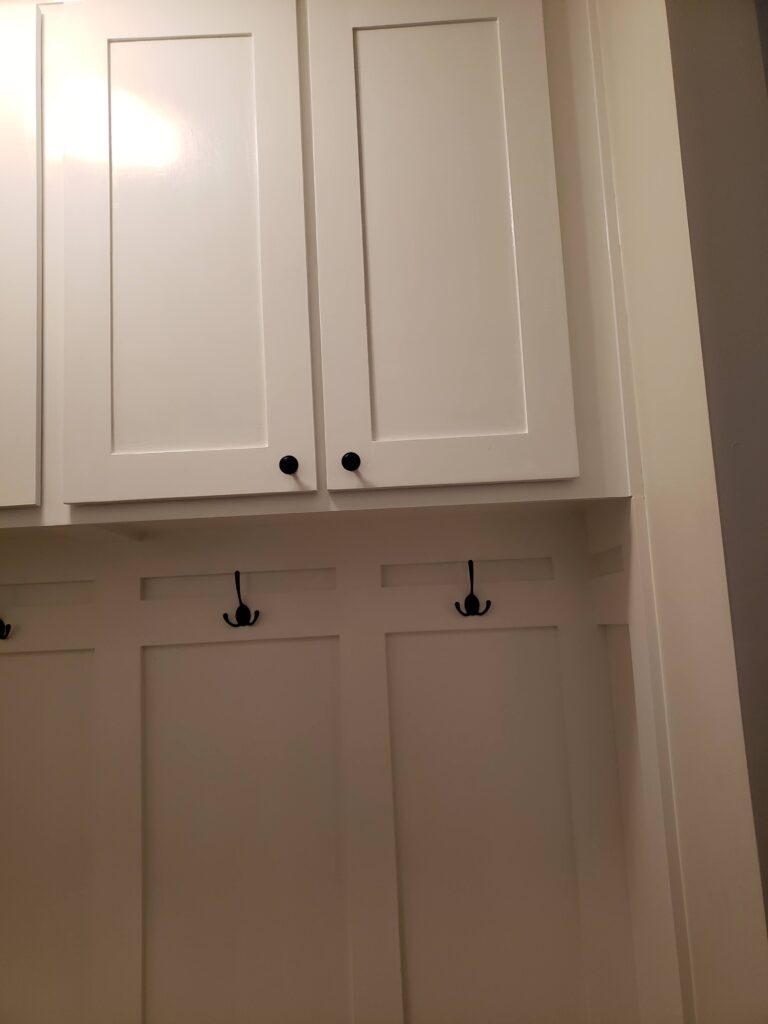
From there, I started to work out the specifics of my design. Since the cabinets would be custom, I opted to take them all the way to the ceiling. I would also take the opportunity to finish the underside of the cabinets in a way that makes them look like a design element rather than an after-thought. I did this by trimming all of the gaps to the walls and in between the cabinets, avoided pocket screws on the visible surface, and painted everything to match. The doors doors/frames are made of out of solid maple and 1/4″ birch sheets. The carcass of the cabinets are 3/4″ maple plywood, finished clear. The rails/styles of the hook area are made from poplar which has been glued straight to the drywall and screwed into studs where available (especially around the hooks). I find that a good instant grab glue works great here.
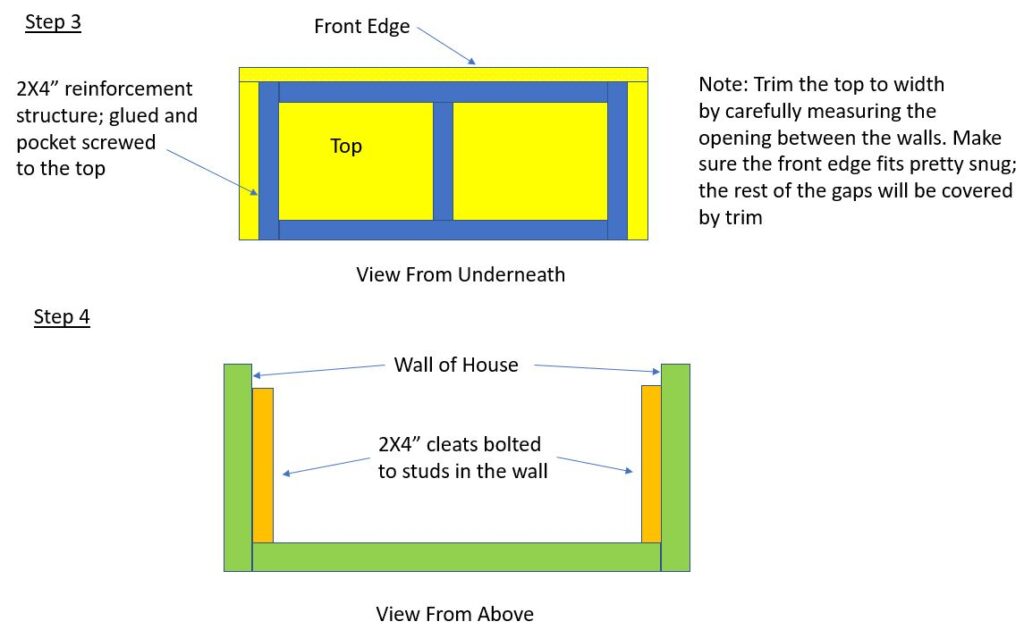
The Floating Bench
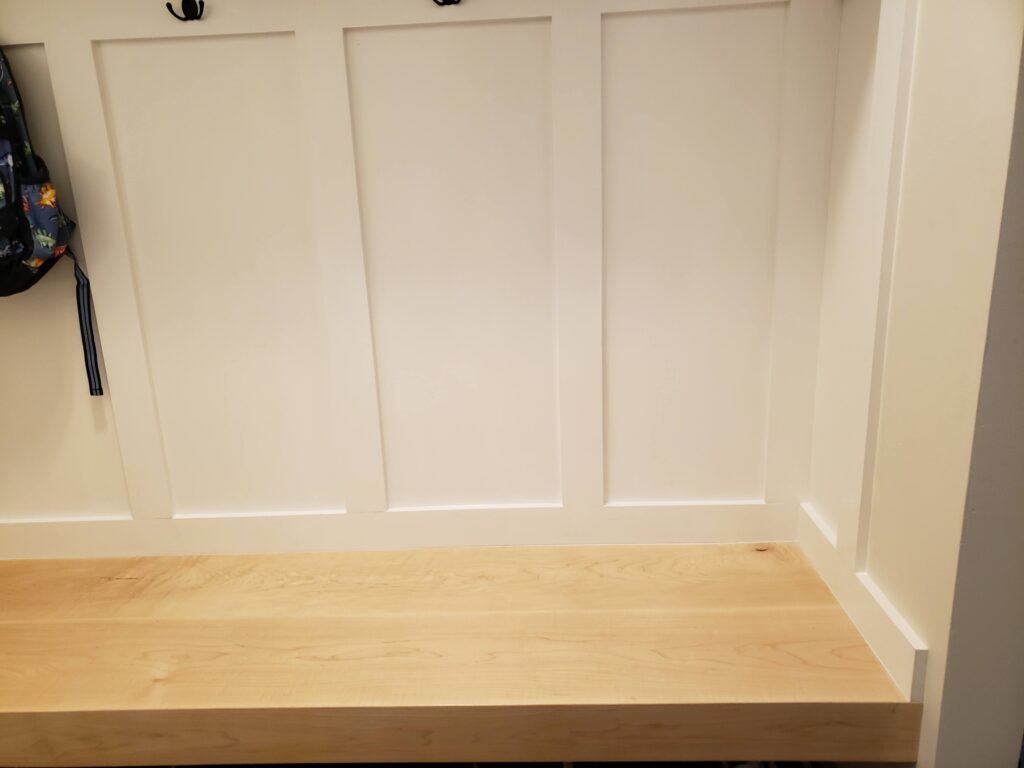
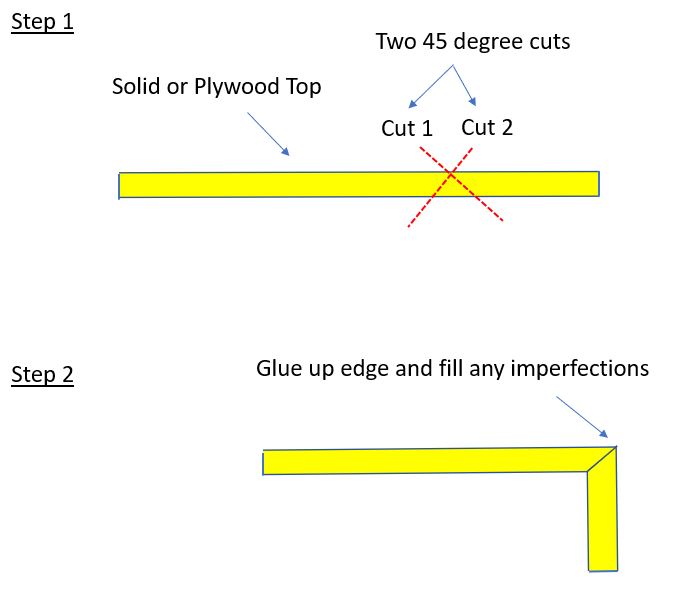
The bench itself was the biggest challenge since it needed to look strong and be strong while also not overwhelming the space. It also needed to mount easily and seamlessly. I decided to go with solid hard maple for the top and to include a waterfall front that makes it look thicker than it is. By “waterfall”, I mean that I glued up one large slab for the bench and then cut the top away from that piece. This method is really cool since you can have the grain continue from the horizontal to the vertical service so it looks like one piece. Once the top was glued up and ready, I ripped the top part away at a 45 degree angle and cut a corresponding 45 degree angle on the bench side. I then carefully glued them back together using clamps and tape to get the best fit that I could. Little imperfections were quickly handled with wood filler and then the entire face was sanded. Next, I went about reinforcing the bench with lighter and cheaper structural lumber, glued and pocket screwed. I left room on each side of the bench to accommodate “cleats” that would help connect the bench top to the walls as well as act as a holder for the top as the final screws are being installed. Next, I trimmed the sides of the top to fit into the opening, making sure that the front of the bench fit nearly perfectly between the walls while the rest of the bench could afford much more “slop” since they would be covered with trim. Finally, I finished it with few coats of a clear finish. In the interest of keeping VOC’s to a minimal in my home, I tried out a new varnish product from ECOS. I must say that I was impressed. No smell, easy to work with, and (hopefully) long lasting. In either case, this has far fewer health concerns than polyurethane and I was able to use it in my basement without anyone complaining. Let’s see how well it wears. Below are a few diagrams to further explain what I am talking about above.

Pulling It All Together
Finally, it was time to pull it all together. I won’t get into how the cabinets are made as there are tons of great resources out there to walk you through the process. So, after those were built and secured to the wall, the rest was just cutting trim, installing the trim with glue/nails/screws, covering all small gaps with caulk, and painting. All of the painted surfaces were then finished with the same semi gloss finish I used on the bench. This provides another layer of protection for these high touch areas that paint alone will struggle with.
This was the first time I did a built-in on this scale and I was pleasantly surprised at how well it came together. Despite all my detailed design work to get the dimensions right, though, I failed to realize that the door on one of the cabinets just makes contact with the light on the ceiling when you try to open it fully. The cabinets are still usable, but I put a little bumper on the edge of the lamp to protect it. If were a bigger deal I could switch the light out with a recessed or flat led fixture and solve the problem permanently. For now, though, its not a big deal. Just goes to show you that the best laid plans can still have issues! In the end, it ended up taking a couple of weeks to complete as I slowly chipped away at it in my freed time. I would call this a High Difficulty project but it was lots of fun and the result were well worth the effort.